Golden Hour: The Best Time of Day for Photoshoot
The best time of day for photoshoot depends on the lighting. Typically, golden hour, just after sunrise and before sunset, offers soft, warm light. A family photographer often emphasizes the importance of golden hour for capturing stunning family portraits, as this time provides the optimal lighting conditions. Blue hour provides cool tones before sunrise and after sunset. Even midday light has its opportunities if handled well. This guide explores each time in detail, helping you determine the best time of day for photoshoot for your specific needs.
Key Takeaways
-
Golden hour, occurring shortly after sunrise and before sunset, offers soft, flattering golden hour light ideal for portraits and landscapes, making it a preferred time for photographers.
-
Each time of day presents unique lighting challenges and opportunities; midday light can be harsh but can be managed with the right techniques, while overcast days provide even lighting perfect for colors and portraits.
-
Effective planning, including using weather apps and scouting locations, is crucial for maximizing different lighting conditions and ensuring high-quality photos with optimal golden hour light.
Golden Hour: The Prime Time for Photography
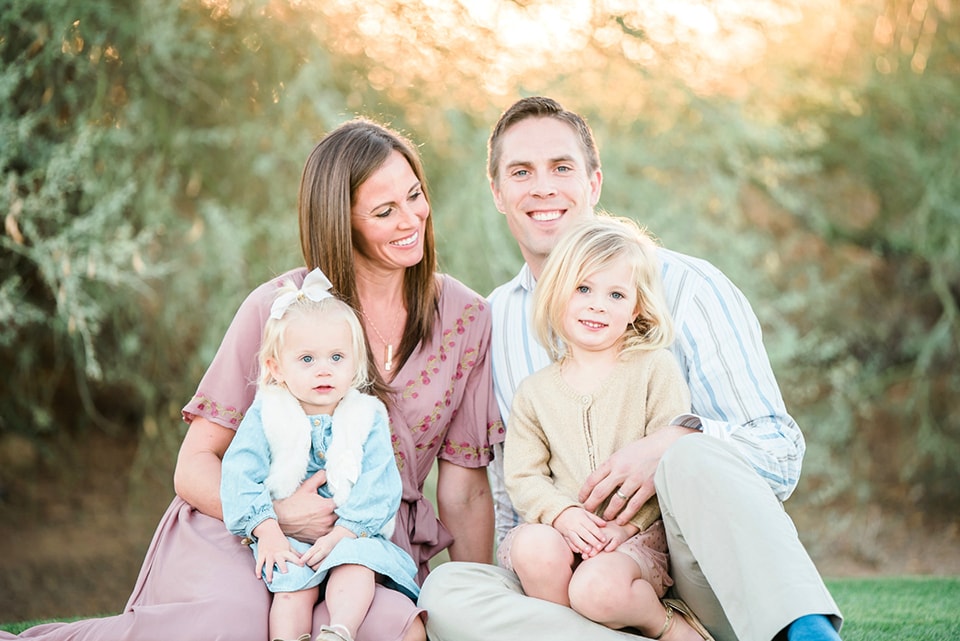
Golden hour, often referred to as the “magic hour,” is the period shortly after sunrise and before sunset when the sun’s position creates soft, warm, and diffused golden hour light. As the sun is lower in the sky, the intensity of direct sunlight decreases and more indirect light from the atmosphere becomes available, helping to create a more flattering and balanced illumination in portraits. This golden glow enhances the mood, highlights textures, and flatters skin tones, making it a favorite among photographers for portraits and landscapes alike.
Professional photographers cherish golden hour for its consistent lighting and the special ambiance it brings to outdoor portraits and engagement sessions. The quality of natural light during this time is unparalleled, casting long shadows and a golden hue that transforms everyday scenes into breathtaking images.
Maximizing golden hour photography requires careful planning and perfect timing, as the opportunity for this enchanting light is fleeting and changes quickly.
Morning Golden Hour
The morning golden hour, occurring shortly after the sun rises, offers a serene and tranquil environment for photography. The early morning light is soft and less intense than later in the day, creating a calm atmosphere that enhances the beauty of landscapes and portraits alike. One of the biggest advantages of shooting during the morning golden hour is the absence of crowds, which allows photographers to capture cleaner backgrounds and more intimate scenes.
For those willing to rise early, the morning golden hour provides unique opportunities. The soft light and minimal human activity result in stunning, atmospheric shots.
Tracking golden hour times with weather apps and scouting locations in advance can significantly improve the quality of morning golden hour shots. Identifying open sky locations can help avoid unflattering shadows and maximize the beautiful golden hour light.
Evening Golden Hour
The evening golden hour, occurring shortly before the sun sets, is equally magical but offers a different vibe compared to the morning. The warm, golden light during this time is perfect for romantic couple shots, as it casts a flattering glow and enhances the emotional tone of the images. However, it’s important to be mindful of the popularity of this time, especially in tourist hotspots, as it can lead to crowded scenes.
To make the most of the evening golden hour, adding a fill light can help maintain detail in silhouetted subjects without losing the dramatic effect of the setting sun. The key to successful golden hour photography is to be prepared and flexible, as the lighting conditions change rapidly during this time.
With the right planning and techniques, the evening golden hour can produce some of the most memorable and visually stunning golden hour photos.
Blue Hour: Capturing Cool Tones
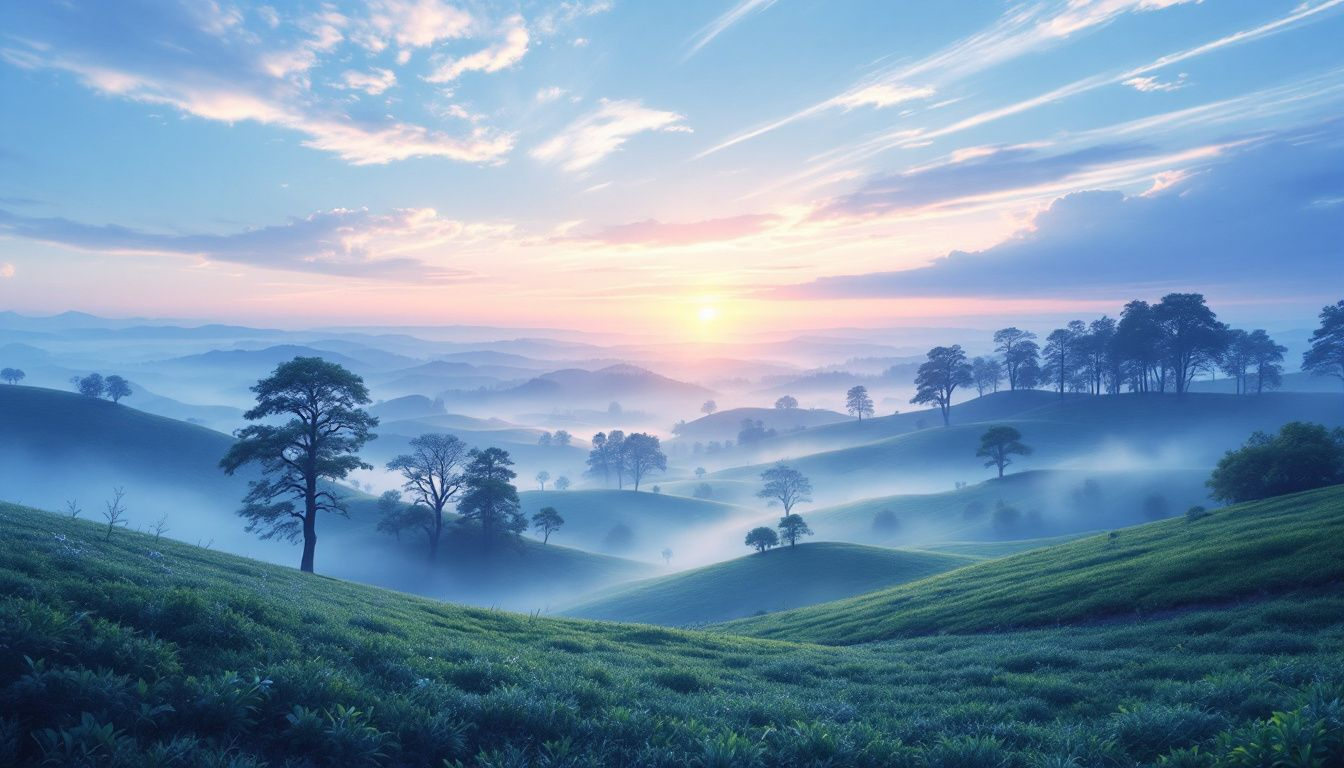
Following the golden hour, the blue hour presents a brief yet captivating window for photography. This period occurs twice daily, just before sunrise and immediately after sunset, offering deep blue hues and unique lighting conditions. Unlike the warm tones of the golden hour, blue hour light provides a cooler, more tranquil atmosphere that can add a magical touch to your photos.
The blue hour is a favorite among photographers for its distinct mood and the beautiful light it brings, especially when considering the effects of blue light. However, it only lasts for a few minutes, making it essential to act quickly and be well-prepared.
Adjusting camera settings to handle the low light and using a tripod are crucial to capturing sharp, clear images during this time. The contrast between the blue hour and the preceding or following golden hour can create a striking visual narrative in your photography.
Pre-Sunrise Blue Hour
The pre-sunrise blue hour offers a quiet and moody setting for photography, with minimal human activity to disrupt the scene. This time of day is perfect for capturing tranquil landscapes and atmospheric shots.
Managing low light by increasing ISO and using a tripod ensures your images remain clear and sharp.
Post-Sunset Blue Hour
The post-sunset blue hour, occurring shortly after the sun sets, is characterized by deep blue hues and a serene ambiance. This period is ideal for capturing dramatic silhouettes against the fading light, adding a mystical quality to your photos.
Employing a tripod and higher ISO settings helps manage low light, resulting in sharp, detailed images.
Midday Light: Challenges and Opportunities
While golden hour and blue hour are often hailed as the best times for photography, the middle of the day presents its own set of challenges and opportunities. The midday sun, with its harsh and direct light, is generally considered the least favorable time for photography due to the high contrast and unflattering shadows it creates. However, with the right techniques, even midday light can be harnessed to produce striking images.
Effectively managing exposure is crucial for dealing with midday’s harsh lighting. An ND filter can simulate softer light, and adjusting flash power can balance intense ambient light. Creative use of available light and the proper camera settings can transform midday sun from a hindrance into an asset.
Managing Harsh Shadows
The harsh light of midday often results in unflattering shadows, making it challenging to achieve well-balanced images. Using flashes or reflectors to fill in shadows on the subject’s face can create a more balanced and pleasing light. Additionally, the harsh lines created by shadows can be used as a compositional element to add depth and interest to the images.
Positioning the subject strategically to use shadows creatively is another technique to manage harsh light. Side lighting and longer shadows can be employed to highlight textures and add a dramatic effect to the photos. Understanding and manipulating light allows photographers to use midday sun’s harshness to their advantage.
Creative Use of Direct Sunlight
Direct sunlight, while challenging, offers unique opportunities for creative photography. The sharp shadows and highlights it creates can add depth and dimension to compositions, making the images more dynamic and engaging. Taking advantage of breaks in cloud cover can produce beautiful shafts of sunlight, with the sun shining, creating a dramatic effect that captures the viewer’s attention.
Embracing the contrast and directional light of midday can help photographers create high-impact, standout images. Using elements like backlighting and side lighting can enhance the subject and add a sense of drama to the photo.
With the right approach and a bit of creativity, direct sunlight can be used to produce stunning, memorable images.
Overcast Days: Soft and Even Lighting
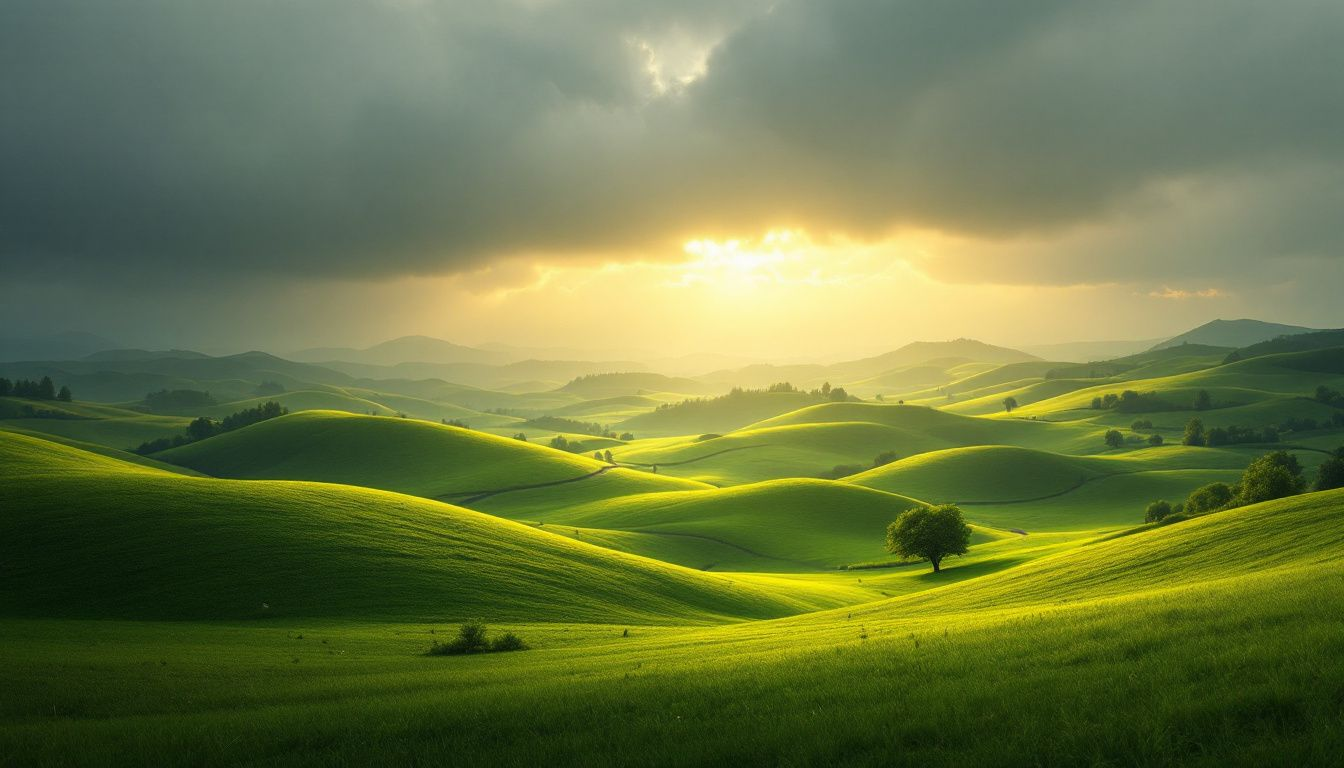
Overcast days might not seem ideal for photography at first glance, but the soft, diffused light they provide can be incredibly beneficial. The clouds act like a giant softbox, spreading the light evenly and reducing harsh shadows. This consistent lighting condition makes overcast days perfect for capturing vibrant colors and flattering portraits.
The even lighting on cloudy days enhances colors and creates smooth transitions between highlights and shadows, improving the overall quality of the images. Understanding how to work with overcast light allows photographers to produce beautifully lit, standout photos.
Benefits of Cloudy Skies
Photographs taken on cloudy days often feature more vibrant colors due to the even lighting conditions. This softer light results in flattering skin tones, making it perfect for portraits. Color contrasts are enhanced under cloudy conditions, bringing out the richness and depth in the images.
Backlighting during midday can reduce harsh shadows on subjects’ faces, resulting in a more pleasing look. Employing scrims to soften direct sunlight can further enhance the quality of light, ensuring well-exposed subjects without losing detail.
Tips for Shooting on Overcast Days
While overcast lighting is soft and even, colors can sometimes appear flat. Incorporating pops of color in your composition can counteract this effect and enhance the image significantly. Elements like colorful clothing or accessories add vibrancy and interest to photos.
Another technique is to utilize negative fill to add dimension to subjects by reducing reflected light. This technique creates a more dynamic and visually appealing image, even in flat lighting. Employing these tips allows photographers to maximize overcast days and create stunning photos.
Rainy Day Photoshoots: Embrace the Elements
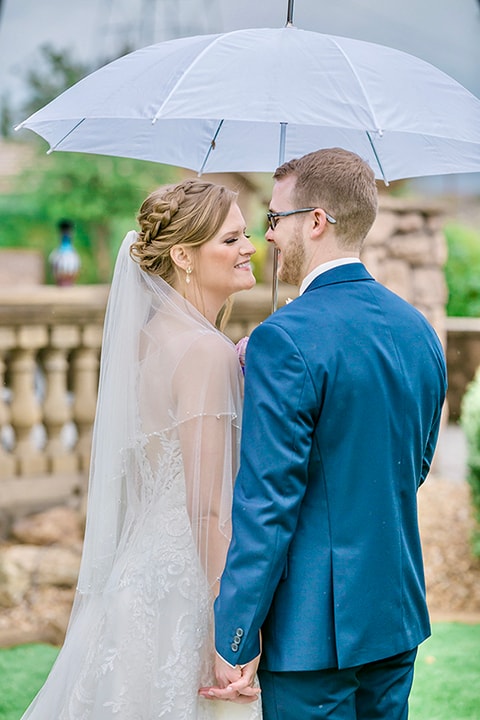
Rainy days might not seem like the best time for a photoshoot, but they offer unique opportunities for creative photography. The reflections in puddles can add depth and interest to your images, creating striking visual compositions. Embracing the elements and using the rain to your advantage can result in beautiful and memorable photos.
Rainy days also bring out vibrant colors and playful elements that can enhance your photography. Capturing reflections in puddles and the interactions of people with rain can add a dynamic and emotional element to your shots. Viewing rainy days as an opportunity rather than a hindrance allows for the creation of unique and captivating images.
Preparing for Wet Weather
Preparing for wet weather is crucial when planning a rainy day photoshoot. Bright, warm colors like yellow or red can stand out against the gray background, adding a pop of color to your photos. Waterproof shoes and gear keep you comfortable and focused on capturing the perfect shot.
Creative Rainy Day Ideas
Candid moments of people with umbrellas add a dynamic element to rainy day photography. Photographing interactions with rain, like jumping in puddles or walking through rain, can convey strong emotions and create visually appealing images.
Including umbrellas and raincoats in your shots captures the essence of rainy day adventures. Kids, in particular, are fun to photograph as they joyfully play in the rain, adding a sense of spontaneity and joy to your images.
Embracing the rain and being creative can turn a gloomy day into a perfect opportunity for unique photography.
Camera Settings for Different Times of Day
Mastering camera settings is vital for the best results at different times of the day. Each lighting condition requires specific adjustments to capture the scene accurately and artistically. Understanding how to tweak settings for golden hour, midday, and blue hour ensures well-exposed, visually compelling photos.
Whether you’re shooting in the soft light of golden hour, the harsh midday sun, or the cool tones of blue hour, knowing how to adjust your aperture, shutter speed, and ISO is key. These settings not only influence the exposure but also the overall mood and quality of your images.
Golden Hour Settings
Golden hour photography benefits from settings that maximize the soft, warm light. A larger aperture allows more light, creating a shallow depth of field that highlights the subject against a beautifully blurred background. A slower shutter speed can be used due to lower light intensity, but balance is needed to avoid motion blur.
ISO settings between 800 to 1200 are recommended to maintain image clarity without introducing too much noise. Exposing for the highlights ensures that the rich colors of the golden hour aren’t blown out, preserving the natural beauty and warmth of the scene.
Midday Settings
Photographing under harsh midday sun requires different settings to manage the intense light. A smaller aperture, such as f/11, helps reduce light intake, preventing overexposure. Fast shutter speeds are essential to freeze action and counteract the bright lighting conditions.
Manual mode provides precise control over exposure settings, allowing adjustments based on lighting conditions. By carefully managing these settings, you can capture sharp, well-exposed images even in the challenging light of midday.
Blue Hour Settings
The low light conditions during blue hour necessitate specific adjustments to ensure clear, sharp images. Increasing ISO helps capture more light without blur, but balance is essential to avoid excessive noise. Using a tripod is crucial to stabilize the camera and prevent motion blur during long exposures.
Higher ISO settings paired with a tripod ensure effective capture of blue hour’s subtle, beautiful light. Proper exposure is crucial during this time to prevent underexposed images in low light.
Planning Your Photoshoot Based on Lighting Conditions
Effective planning is crucial for maximizing different lighting conditions. Tools like weather apps and advance scouting help anticipate the best times and locations for your photoshoot. Apps like Photo Ephemeris and PhotoPills provide detailed information about natural light conditions, helping you plan for golden hour, blue hour, and other key times.
Knowing how light interacts with your location throughout the day helps visualize potential shots and prepare accordingly. This foresight significantly improves image quality, ensuring you capture the best light and avoid unforeseen challenges.
Using Weather Apps
Weather apps offer real-time updates on lighting conditions and forecasts, making them invaluable for photographers. Apps like Photo Ephemeris and PhotoPills track the sun’s position, golden hour times, and cloud coverage, enabling precise shoot planning.
These tools alert you to optimal shooting times and help adapt to changing weather conditions.
Scouting Locations
Scouting locations in advance is essential for understanding light interaction with different environments. Visiting potential sites ahead of time allows photographers to visualize how the sun’s position and shadows will affect their shots, optimizing compositions. This preparation ensures you maximize available light and capture desired images without surprises.
Exploring locations in person helps identify unique features and angles to enhance your photos. This hands-on approach helps anticipate lighting changes and adjust your shooting plan, ensuring the best possible images in any lighting condition.
Summary
Understanding and mastering the various lighting conditions throughout the day can significantly enhance your photography. From the magical light of golden hour to the cool tones of blue hour, and even the challenges of midday sun and rainy days, each time of day offers unique opportunities. By planning ahead, adjusting your camera settings, and embracing the elements, you can create stunning, memorable images that stand out. Let the light guide your creativity and elevate your photography to new heights.
Frequently Asked Questions
What is golden hour in photography?
Golden hour in photography is the period right after sunrise and before sunset when the lighting is soft and warm, creating ideal conditions for capturing stunning images. This favorable light enhances colors and reduces harsh shadows, making it a favorite time for photographers.
How can I find the exact time for golden hour?
To find the exact time for golden hour, utilize weather apps such as Photo Ephemeris and PhotoPills, which effectively track lighting conditions including golden hour. This will help you plan your photography sessions with precision.
What camera settings should I use during blue hour?
To capture clear images during blue hour, increase the ISO and use a tripod to stabilize your shots in the low light. These adjustments will help you achieve the best results.
How can I manage harsh shadows during midday?
To manage harsh shadows during midday, use flashes or reflectors to fill in the shadows and creatively position your subject to take advantage of the harsh light. This approach can significantly improve your photography.
What are the benefits of shooting on overcast days?
Shooting on overcast days enhances colors and creates flattering portraits due to the soft, diffused light, resulting in smooth transitions between highlights and shadows. This lighting condition is ideal for achieving beautiful, natural images.


